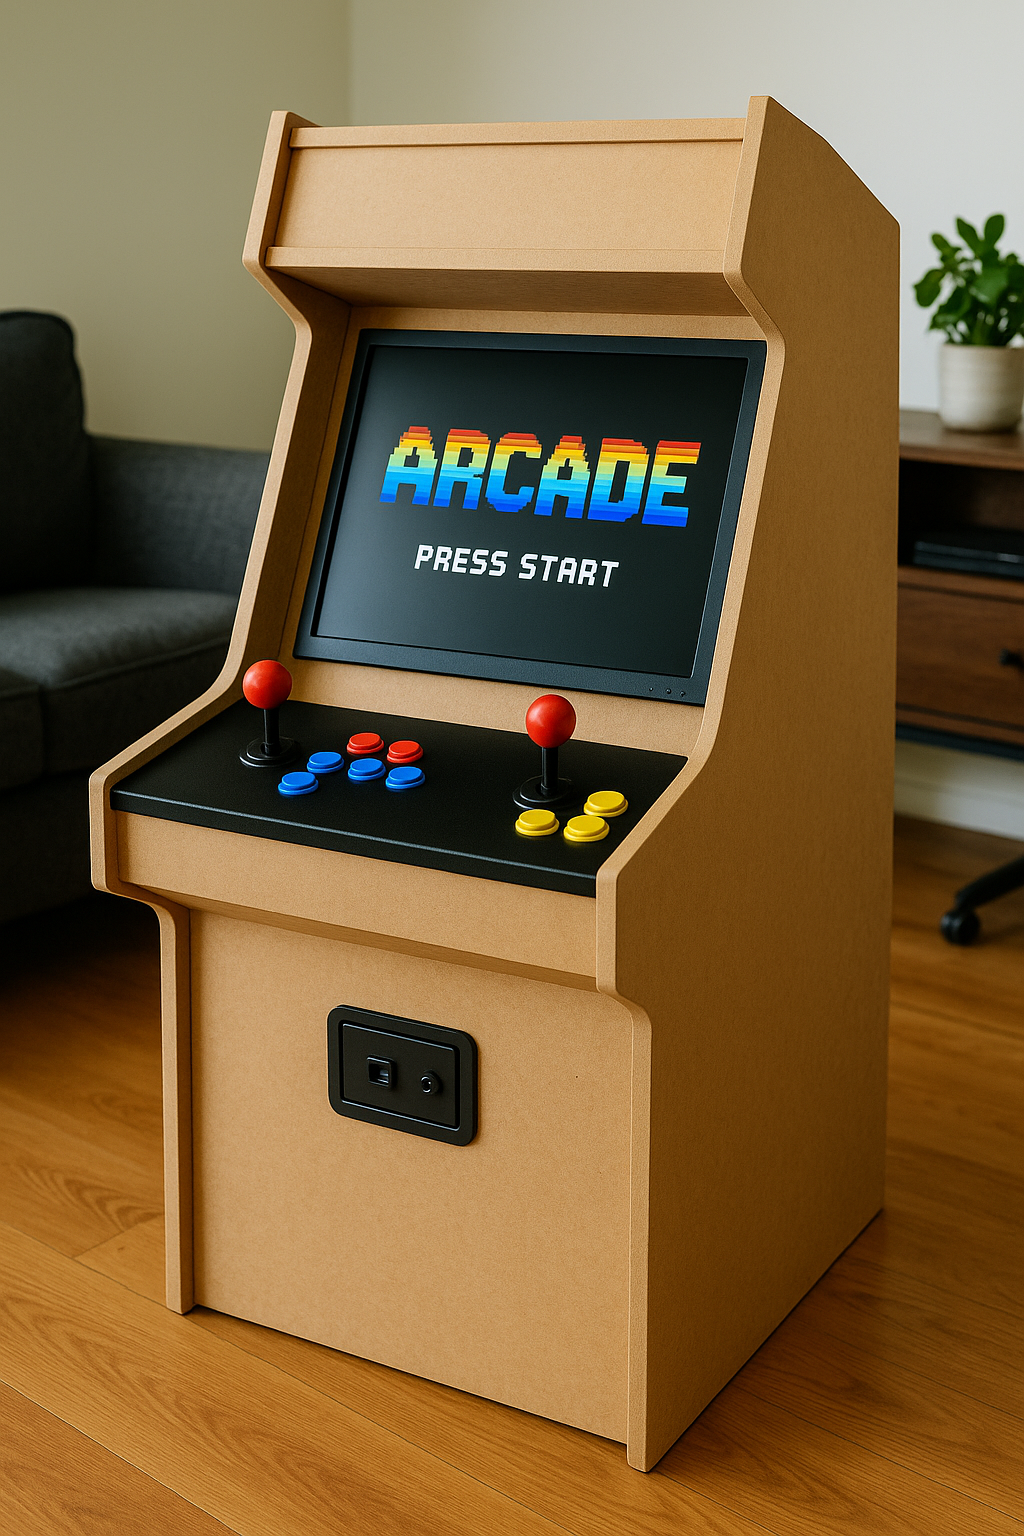
Level Up Your Living Room: Building a Custom Arcade Cabinet for Under $500 (A Beginner's Guide)

Level Up Your Living Room: Building a Custom Arcade Cabinet for Under $500 (A Beginner's Guide)
🎮 What It Is & Why It Matters
Building your own arcade cabinet isn’t just a throwback project—it’s a gateway to reliving the golden era of gaming. From Pac-Man to Street Fighter II, a DIY arcade setup lets you load up your favorite classics, customize your cabinet's look, and save serious cash doing it.
Store-bought machines can set you back over $1,000. With this beginner-friendly project, you’ll get the same nostalgic hit, better tech flexibility, and bragging rights for half the cost.
✅ Benefits of a DIY Arcade Cabinet
- Budget-friendly: Keep your build under $500 without compromising quality.
- Custom look: Design your cabinet’s aesthetics to fit your style—retro, minimalist, cyberpunk—you name it.
- Upgradeable hardware: Swap parts like buttons, screens, or even the system with ease.
- Supports emulators: Load MAME, RetroPie, or other emulators for thousands of games.
- Fun project: Perfect weekend DIY that combines woodworking and gaming.
🛠️ The Best Tools and Materials
Here’s a list of essentials to get started:
Core Hardware
- Raspberry Pi 4 Kit (with power supply, SD card): ~$90
- Used monitor (19–24”): ~$50–$80
- Arcade button + joystick kit: ~$40
- 2x MDF wood sheets (¾”): ~$70
- Speakers (USB or aux): ~$20
- HDMI cable + USB extenders: ~$10
- Power strip + wiring accessories: ~$25
Tools You'll Need
- Circular saw or jigsaw
- Drill and screwdriver
- Clamps
- Wood glue
- Sandpaper
- Paint or vinyl wrap
🧱 Step-by-Step Guide to Building Your Arcade
1. Plan & Measure
Start with a blueprint. Good sources include:
- The Geek Pub Arcade Cabinet Plans
- Reddit’s r/cade
- TinkerCAD (for custom dimensions)
Decide on a bartop, upright, or mini version based on space.
2. Cut the Wood
Cut out:
- 2x Side panels (with curves for arcade shape)
- Control panel
- Monitor shelf
- Base panel
- Rear door
Tip: Most hardware stores will do the cuts if you bring a plan.
3. Assemble the Frame
Use screws and wood glue to assemble:
- Attach side panels to base
- Add monitor shelf and back panel
- Clamp and let dry
- Reinforce corners with brackets
4. Sand & Paint
Smooth all surfaces and apply:
- Primer + paint (black, red, neon)
- OR
- Vinyl wrap for custom graphics
Optional: Add T-molding for pro finish (cut grooves with a slot cutter).
5. Mount the Monitor
- Mount directly using VESA bracket or
- Create a wooden frame to support it behind a cut-out bezel
Ensure your monitor is centered and at a comfortable height.
6. Install Electronics
- Connect Raspberry Pi to the monitor
- Flash RetroPie or Recalbox OS onto your SD card
- Connect arcade buttons to a USB encoder and plug into Pi
- Set up speakers via audio jack or USB
- Route wires cleanly inside the cabinet
7. Boot & Configure
- Plug in and boot up
- Configure controls in RetroPie setup menu
- Load your favorite ROMs (legally!)
- Add game art, shaders, and themes
⚠️ Common Pitfalls to Avoid
- Overcomplicating the design: Keep it simple for your first build.
- Skipping the sanding step: It’s worth the effort for a professional look.
- Using a weak monitor mount: Secure it well or risk it falling during gameplay.
- Poor cable management: Use zip ties and channels to keep things tidy and safe.
- Not checking joystick/button layout: Use tested templates to avoid discomfort during play.
🔮 Future Trends in DIY Arcade Building
- LCD + CRT emulation shaders: More software options that mimic classic displays.
- Modular designs: Swappable panels for changing games (fighting, racing, etc.)
- Online leaderboards: RetroPie now supports online scoreboards via add-ons.
- Smart home integration: Voice-activated cabinet startup? It's already a thing.
🏁 Final Thoughts
Building your own arcade cabinet is one of the most rewarding DIY gaming projects you can take on. Whether you're reliving childhood hits or introducing classics to a new generation, this cabinet becomes more than a machine—it’s your custom-made portal to pixel paradise.
All for under $500.
All built by you.
Ready to join a community of gaming builders and modders?
👉 Check out heet.gg for more gaming projects, mod guides, and expert tips.
Recommended
# 🧠 Top 10 Mind-Bending Puzzle Games to Tackle with Friends in 2025
3 months ago
Reliving PS2 Classics: A Step-by-Step Guide to Emulating PlayStation 2 Games on Modern PCs
3 months ago
Best Pokémon for Ultra League in Pokémon GO (2025 Guide)
1 month ago
What We Know About Grand Theft Auto VI's Vice City: Lore, Locations, and Speculation
3 months ago
The Future of Gaming is in the Cloud: Xbox Cloud Gaming, Fortnite, and the Rise of Streaming Platforms
3 months ago

